

Step-by-step instructions for loading presets into the mobile Lightroom

We are glad to see you in our step-by-step instructions. Below in this guide, we've covered (including screenshots) the entire installation and use of presets so that you can quickly and easily install DNG presets in the Lightroom mobile app.
Use one-click presets to get the magic of editing exposure, brightness, and color in your photos.
Before you start, you need to make sure you have the Lightroom CC app installed on your phone. This is a free app available for iPhone and Android users. Click on the icons or links below to download!
FOR IPHONE
FOR ANDROID
We've made loading presets faster and easier. You download presets directly from our website.
Read these simple steps below and follow the screenshots so that I miss nothing, let's go!
So, after purchasing, within a few minutes you will receive an email from us:

Click on the “View your Downloads” button, you will be taken to the browser. On the page in the browser, you will see your order.
Each preset has a Download button next to it. Click on the "Download" button next to the first file, then confirm the download. You will see a small download arrow in the upper right corner, click on it and in the window that opens, click on the downloaded file (the preset has been uploaded to your Downloads folder on your phone).

In the window that opens, click on the arrow in the upper right corner and select Lightroom from all applications. If the application is not in quick access, click "More" and select Lightroom from all applications. Also, please, Click "Launch Lightroom Now" to go directly to Lightroom.

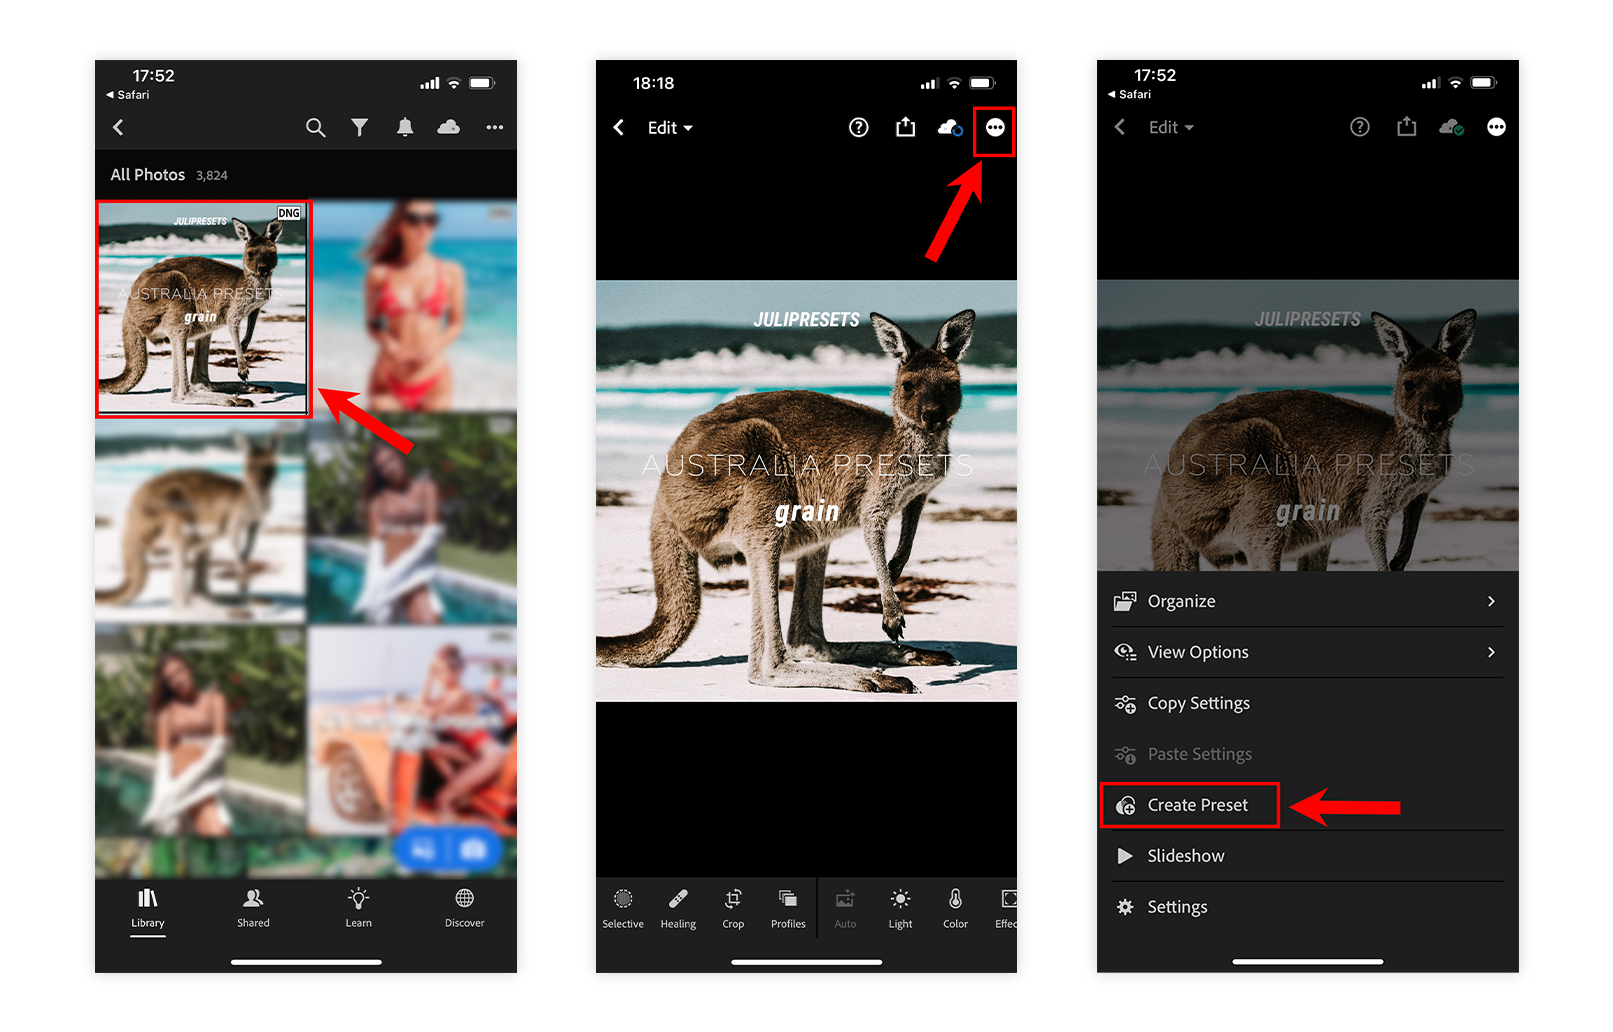
So, you've loaded the preset into Lightroom, it's time to add it to the editing panel in the Presets tab. So, open the picture with the preset that we just imported into Lightroom, click on the 3 dots in the upper right corner and select "Create Preset".
 Enter a Preset Name and create a new preset group for convenience. To do this, click on “Create New Preset Group”. After creating a new group, click on the checkmark in the upper right corner to save.
Done, the preset has been saved to your Lightroom in the editing panel. Let's move on to editing your photos.
Add your photo to Lightroom and select it.
Scroll the editing panel to the left and select the Presets tab. By default you will get built-in Lightroom filters. Click on the drop-down menu and select the preset group you are creating for the new preset.
To apply a preset to your photo, just click on it. Also, you can easily switch between presets to choose the most suitable for your photo. To apply a preset, click on the checkmark in the upper right corner.
Done, the preset has been applied to your photo.

A preset is not only one-click presets for your photo, it's also a good base for editing. After applying a preset, you can make additional settings to adjust the preset settings for better editing results.
Do you want to make your Instagram feed brighter and in one style? Then you definitely need Light and Airy presets! This is what you will really enjoy. Click here and buy it!
Basic edits in Lightroom (read here!).
Basic edits in Lightroom (read here!).


ggavj9
mmdm6l
kkc5j2
erh4qf
u7zg3y
Leave a comment